RSS

Red Velvet Fudge


This is mostly a review of I am Baker's Red Velvet Fudge.
I know I have said his before, but I'll say it again. I NEVER read instructions. Except for this recipe. 
I read how she couldn't find a good recipe and finally found one on allrecipes.com and read it 17 times. I read the fine details on how to make it, over and over again. It sounded so tedious and like a lot of work. But I wanted to do it still, so I went out and got everything I needed:

1/2 cup Buttermilk
1/2 cup Sweetened Condensed Milk
2 cups White Sugar
1/4 cup Cocoa
3 tablespoons butter
1 tsp vanilla
1 tsp red gel food coloring


What you need to do:
Using a 5×9 pan (if you want thinner pieces, use 8×8) line pan with wax parchment paper or wax paper.  Make sure you have some extra on all four sides.

Combine sugar, cocoa, buttermilk, sweet condensed milk, and food coloring in a non stick pan. 
 Stir to combine.  Bring to a boil, stirring constantly, but do not scrape down the sides. (to avoid getting crystallized sugar in fudge)


Using a well calibrated thermometer, make sure the fudge gets up to 238 degrees. (My thermometer doesn't  go up that high, so I had to assume)

Reduce heat and allow fudge to simmer. Quoted from I Am Baker "DO NOT STIR. At all.  Like seriously dont even touch the pan." I actually let it simmer for a while but then after like 30 min I turned off the heat but let it sit.

Allow fudge to cool to 110 degrees. 
At this point I put the mixture in my mixer and add butter and vanilla.

Beat by hand or use electric mixer until fudge loses its sheen. I am Baker said it took her 20 minutes but I left mine on for like an hour... I swear! 

Place in prepared pan and allow to cool, usually 1-2 hours. (Mine still didn't stiffen so I placed it in the freezer for a while longer.


All in all, it came out tasty.
I think I would use powdered sugar next time because it came out somewhat grainy. 
It was time consuming, as well, and I'm not sure if I will bake it again because it took so long. I'll do more research into it.

Linked to THESE awesome linky parties. 

A Themed Baker's Sunday #25

WOO HOO!!! 
25 linky parties already?!?!??! 
Time flies! 
Quick interruption:
Our last theme was cakes because it was my hubby's birthday yesterday


Ok, ok, I'll stop being proud and go back to our winner.
This one was tough! 
There were a lot of good and pretty cakes! It was a close one, but it was Joe's decision in honor of his birthday.

Sounds ordinary but she used King Arthur Flour Black Cocoa and strong coffee in this cake. 
Joe and I thought this has a certain classic with a twist because of it. Congrats!
Grab your I was Featured button on the right side here --->

NEW THEME!

Let's just go with random this week.
Any fruit, cakes, rolls, candies, pies, bars, cookies, muffins, breads, etc.
PLEASE ONLY LINK BAKING AND PASTRIES!!! NOT COOKING RECIPES!
Thank you! :)

Blue Velvet Cake with Cream Cheese Frosting and Blueberries

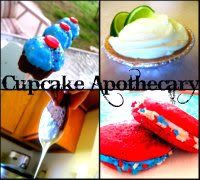
Well, here it is! The BLUE VELVET CAKE for Joe's Birthday!
This recipe was featured on 


I'm not a huge cake maker, but I love to decorate. I don't know why I get cupcakes so much but I can't get cakes. I got this recipe from Adventures in Cooking and if I have not told you before, I am HORRIBLE at following directions. HORRIBLE, I say! I feel like the instructions to this cake were crazy, first off, not in order and just all out confusing. But that could just be me; like I said, I'm horrible at following directions. I never have butter or eggs at room temp, because I don't plan me baking, it just happens! I don't do all this mixing the dry ingredients and wet separately (unless I'm hand mixing) because I have an amazing mixer which mixes everything rather exceptionally! Anyways, moral of the story... horrible at reading instructions. 


Review of the cake: It came out REALLLLLLLY spongy, it needed a lot more cocoa powder, after velvet cake is basically a chocolate-y cake with tons of dye and needs to be smooth! It's called a VELVET cake not sponge cake! Other than that, it came out really good! Especially the frosting and blueberry syrup! SO I have made some corrections to the ingredients. If you have anymore suggestions or corrections, I'd love to hear them!

Ok onto the cake!

What you'll need for Blue Vevlet Cake:

1 1/4 Cups Cake Flour, sifted
1/2 Cup and 3/4 Cups Granulated Sugar
1/3 cup Cocoa Powder (This is my addition, regular says 1Tbsp)
11 Egg Whites, room temperature (NOTE: this equals roughly 6 eggs, with yolk. ***If you only do egg whites, add in vegetable oil to make it more tender and moist, not tough and spongy***)
3 Teaspoons Vanilla Extract
1 1/2 Teaspoons Cream of Tartar
2 oz. Blue Food Coloring
1/4 Teaspoon Salt
Fresh Blueberries

What you need to do for Blue Velvet Cake:
-Preheat the oven to 375 degrees 
-In a medium-sized bowl, or your mixer, sift together the flour, 1/2 cup of the sugar, and the cocoa powder. 
-In a large bowl, beat together the egg whites, vanilla extract, cream of tartar and salt until they begin to hold soft peaks. 
-Beat in the remaining 3/4 cups sugar and the blue food coloring until the mixture begins to hold stiff peaks, about 4 minutes or so.

-Slowly fold in 1/4 cup of the flour mixture at a time. Make sure to fold, not to stir. 
-Grease very well two 9 inch Spring Form cake pans. Pour batter into pans.
-Bake in the oven for about 30 minutes or until a toothpick comes out of the middle clean

Meanwhile, make the Cream Cheese Frosting that I love oh so much and the blueberry syrup.

Cream Cheese Frosting is HERE

What you need for the Blueberry Syrup:
1 Cup Blueberries, fresh or frozen (but not frost bitten), pureed
1/2 Cup Granulated Sugar
1/4 Cup Water
1 Cup Blueberry Jam, good quality

1 tbsp cornstarch
3-4 tbsp blueberry syrup, cooled

What you need to do for the Blueberry Syrup:

-In a small saucepan, cook the blueberries, sugar and water over low heat for about 8 minutes, or until the sugar has completely dissolved. (I boiled my blueberries since they were frozen, then pureed them)
-Add in jam, make sure to thoroughly mix in. From here, make it to your taste, add  in more sugar or maybe more water. Up to you! 
-Cool your blueberry syrup (I added ice cubes in it)
-Get your cornstarch and mix in with the cooled blueberry syrup (image below)
-Stir in with the rest of the blueberry syrup to help thicken.
-Pour into a serving bowl and place in the refrigerator to chill until serving time.


Cake, Continued...
-Once the cake is done, remove it from the oven and allow to cool for about 15 minutes. 
-Unclasp the hook on the spring form pan, let cool completely.

- Did your cake come out with an ugly 'hill' on top? Carefully and evenly slice it off! If it's not that even, its ok! Use it as your bottom instead! 

-Get the Cake Stand, or if you don't have one, use a flat plate, wide enough to hold the cake plus frosting on the sides, that you can serve it off of.
- Place one cake evenly in the middle of cake stand. 
-FROSTING TIME! YAY!
- Place a HEAPING scoop on top of cake. Spread evenly on top of the cake, not on the sides yet. 

Here is how to spread frosting, just FYI:
 Start with a heaping scoop

Spread to one side, in a slow, smooth motion.

Without stopping, spread in the opposite direction in the same slow, smooth motion.

Keep going back and forth, slowly, smoothly, whilst moving your motions north or south, side to side.

This is how it should start looking.
Smoothed out dip in the middle, swaying side to side.

Once you get the middle evenly spread, spread out the edges. 
Here you can omit extra frosting if this is the middle layer.

Place evenly, so that they're are aligned perfectly the other cake on top of the frosting.
Place other heaping scoopful on top of the cake and spread evenly, the same way I showed you earlier.

On the top layer, spread it out to the edges. keep your hand still as you move your cake stand in a spinning motion. Spread it all out evenly. Don't worry about the edges of the cake, because we're going to have more frosting put on it to hide it!  

Here's a helpful tip for smoothness:
Dip your spatula into hot water, whip off excess water, then spread out the frosting thinly, one more time. This will give it a smoother look!

I don't know if you can see it well, but the middle 'swipe' is from the hot spatula; you can compare and contrast the difference. 

Frosting gun time!
Here's a tip to help keep the frosting in the baggy, if you use them.
A lot of people, including me for the longest time, don't know that you can twist the top and it won't squeeze out! Very effective! 

Remember:
Wipe off the extra frosting smudges on the side!

Make decor however you'd like.
I chose to make a cute and simple beaded outlining.

So, once you have outlined it (Make sure for the top/cake edge don't make the outlining somewhat diagonal, but flat on the surface but on the edge, if that make sense.)
Spread your syrup on the surface with a spoon. It's ok if the syrup falls to the edge, unless you don't want it to, but I did :)

Then add blueberries! You can spread them, but I had to leave room for 26 candles!
 Serve at room temperature with a drizzle of blueberry syrup over each individual cake slice, if you'd like!
Enjoy!

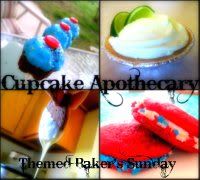
This recipe is linked up to THESE awesome blog hops!


Homemade Restaurant Style Salsa

Yum, yum, yum!
Who can resist a good salsa??
You would think me living so close to Mexico, that there would be a good Mexican Restaurant around here. No. There's Not. 
Well, there is but it's 13 miles north of town and we're 10 miles south of town. And that's not including how many miles the town is! So, we go there on special occasions. :)


BUT! We love great salsa. I love this one because I know it's homemade and I know exactly what's in it.

So, let's get on with it!
What you need:
1 can Whole tomatoes (The big can, can't remember the oz on it, sorry)
2 cans Rotel (I used hot)
1/2 an onion
1 Jalapeno
1 small lime or 1/2 a lime
some Cilantro
1/2 tsp cumin
1/4 tsp salt
1/4 tsp sugar
DON'T FORGET THE GARLIC!
Now, you should know, if you don't already, this house lives, breathes, and runs off of garlic. We put it in everything and we put a lot of it. We'll put huge whole chunks and we like it that way. -- just a side note.
So, when I say to add 2 tbsp of minced garlic, that is just for me and the hubs. But to tone it down, add 1 tbsp.

You will need either a blender or food processor for this next part.

What you need to do:
Pulse the whole tomatoes.  Juices and all
(You want them little, otherwise you'll just have Pico de Gallo, and that's not what we want here.)
Once tomatoes are tiny, pulse in the rotel, juices and all.
Next, chop up your Jalapeno and onion to medium sized pieces. Just so that it'll fit in the food processor. 
You can take out the seeds if you'd like, since I hear that's where all the spice is at. But I included it.
Pulse up your Jalapeno and Onion.
Pulse in everything else! (except for lime)
Now, squeeze the life out of that lime into your salsa! (I asked my big strong hubby to do it *wink*wink* You know they love being masculine for you)

Presto, you. are. done. 

Now, go enjoy your salsa with your family!!!
Source:
The Pioneer Woman

Limeade

I'm in New Mexico and its already starting to get nice and warm out. Joe and I have even grilled a couple times! Well, I thought it would be nice to make a delicious, fresh drink of some sort. My husband is obsessed with Lemonade, but I always choke on it (I don't know why) so I made Limeade! I LOVE Limeade! And for some reason I don't choke on limeade. So:


What you need:
6-7 Limes, squeezed to make 1 cup
8 cups of Water (2 Quarts)
1 1/2 - 2 cups Sugar

What you need to do:
1. Squeeze the living daylights out of those limes
2. Mix in the juice with water
3. Stir in sugar

I recommend drinking this the day of making it, because it gets more and more sour the longer its in the fridge. But I suppose you can add more sugar!
You could even make a cherry limeade by adding a few artificial cherries and a little of the juice in the jar.
Source:
Lick the Bowl Good

A Themed Baker's Sunday #24

Hello Everyone! Hope every one is having a great Sunday
Quick note - My Bosch is broken :(
Not to worry! I have ordered the part that is broken and it'll come in this sometime this week, til then I can only bake bread. So, sorry that I haven't posted anything new

Ok, Onto the winners - There is a 3 way tie!

#3
Musical Cupcakes by: DJ's Sugar Shack
The little musical notes are so cute and I bet had to take a lot of patience.
Thanks for sharing DJ's Sugar Shack!

#2
Neapolitan Cupcakes by: Dulce Fresa Key's
I thought these were so creative! I would have never thought to make Neapolitan cupcakes before.
Thanks for sharing Dulce Fresa!

#1
Key Lime Cupcakes by: What About Second Breakfast?
I am a sucker for cute and a sucker for lime. These are adorable and I bet they were incredibly delicious.
Thanks for sharing What About Second Breakfast!

Congrats to all and make sure to grab a I was Featured button to the right side here --->

Onto our next theme.
Short Story: My husband's 26th birthday is coming up on Saturday. He LOVES red velvet cake for his birthday. Every year I make one for him. Not this year. I'm making him something different: A Blue Velvet cake with a homemade buttercream frosting surrounded by his favorite fruit: blueberries
I'm uber excited!
So, this is an homage to him. 
So, our theme is 
CAKES!
Please, no cake pops or cupcakes. Just cakes. I will include cake rolls though. 

I'm addicted to Pinterest!

I really, really am! I could spend HOURS pinning. If you don't know what pinning is, I'll tell you. Pinterest is an online pin board. I personally have so many websites bookmarked so that I can later do/cook/ refer back to them, but I always forget about them. Out of sight, out of mind! BUT with pinterest you can take any photo on a website and pin it into one of your 'folders'. For example, on my pinterest board (you can follow my boards by clicking the pinterest sign on the right hand column) I have 26 boards, all different categories. I have my photos that I pin from this blog, called Cupcake Apothecary, I have foods I want to cook and bake, Awesome ideas and tips, Christmas ideas, etc, etc, etc.
So do I sit around and just pin? Hell no! I actually do the things I see on pinterest; here are some things I have done:
Beach-y Salt  Hair Spray
Where I live the water is SO HARD! As I have naturally curly hair (Yes, thats me in the photo) and the water here was deteriorating it! But with a few tips, I brought my hair back to life, including the salt spray.

1. Lanza Sun and Swim Shampoo and Conditioner.
It is for people who swim a lot or have hard water. 

 2. Vinegar rinse. 
After I shampoo my hair, I rinse it out with half a glass of water and half a glass of vinegar mixed in. It helps to take out all the crap in your hair, previous hair spray and junk and it helps with the hard water.

 3. Lanza Noni Fruit Detangler and Leave in Conditioner
Once my hair is lightly damp I spray this in my hair, mostly where I have highlights and parts I've bleached.

4. Salt Spray
1 tsp Epsom salt, Few drops olive oil (or Jojoba oil), and 1/4 water (I use distilled water) in a spritzer bottle.

Afterwords my hair comes out nice and curly, as if I was washing my hair in regular water. I know it seems like a lot of work, but this is actually a lot easier than my usual routine of putting 14 different products in it! And if you have curly hair, you know that it takes a lot to keep it nice!

Grow Green Onions
Don't throw those away!
I always have 1 or 2 recipes that call for like 2 tbsp at most and then I have to throw the rest away.
Well, place your green onion ends into a glass with water and in a sunny window and they will keep growing! It's amazing! I've already have had to cut them down and freeze some. Every few days I empty out the water and place new water. 

Memory Jar
I know I don't have many memories in it yet, but it's only the beginning of the year! And there's nothing around to do, but we're trying. Anyways, after the year is up, on New Years Eve, You read them out loud! 
Source: Inchmark

Homemade Dish Washer Detergent
This one I am most proud of! I've recently gotten into a saving money/coupon clipping kick and I noticed how expensive dishwasher detergent can be especially when that detergent doesn't last that long!
So, I tried this and you can compare how amazing it is on my silverware. Like I said, I have hard water and nothing makes them clean-clean. Until now!
I swear I did not tamper with the left knife. I pulled it right out of my silverware drawer. I didn't even know there was some kind of writing on them because they'd come out so foggy! Ok, here is the 'recipe'
1 cup Borax
1 cup Washing Soda
1/2 cup Kosher Salt (I used regular table salt and so did the original resource, and it still worked great)
1/2 cup Citric Acid (double this if you have hard water, which I did, I also used Lemishine)

Basically, mix it all together in a bucket or container. 
Use 1 tbsp each load. 
I use 2, 1 in the open compartment in the dishwasher and 1 in the one that locks and releases during the cycle.
You can find all of these in the detergent aisle.

I also like to use Vinegar in the rinse aid compartment, it works so much better with the hard water and its so much more inexpensive!

Organizing
Sorry, I have no clue what those things are called... Filing racks perhaps? Anyway, if you don't have a lot of room in your kitchen like me, then you'll love this!
Take some mounting tape and stick it to a cabinet, like so.

So amazing! I have another one on the other side holding sandwich baggies as well.
I don't know where I got this idea from, but I know it was on pinterest. 


Homemade White Bread

 Great for sandwiches!

What you need:
5 1/2 cups All-Purpose Flour
2 1/2 tsp Salt
2 tsp Sugar
5 tbsp Butter
2 1/2 tsp (1 Envelope) Active Dry Yeast
2 /2 cup Warm Water

What you need to do:
1. Combine flour, salt, and sugar in a bowl and mix well.
2. Cut butter into 8 slices and add each piece and mix until clumpy.
3. Whisk yeast into water and add into mixture until dough-y. Let sit and cover for 10 minutes.
4. Mix once more and cover again for 30 minutes to an hour until it has doubled.
5. Lightly flour a surface on a counter, and place ball of dough on surface. 
6. Split dough in half. Form both balls of dough into ovals and place into lightly greased and floured loaf pan. 
7. You can make slits on top, if desired.
8. Bake at 400 degrees for 25 minutes or until crispy and golden on the outside and soft and fluffy on the inside.
9. Let cool for about an hour.
10. Cut into sandwich size slices and eat with your favorite fillings!!

Linked to THESE awesome linky parties!

Homemade Tortillas


My husband and I were home one lazy day and we wanted something fresh with chicken and veggies, nothing too heavy. We decided we wanted wraps, we had black beans, corn, peppers, onions, chicken, sour cream and some homemade Honey-Chipotle sauce I had made earlier, but only one tortilla. So I decided to whip some up. (Plus, I would like to make all my breads, tortillas, etc.)


Yes! That's it!


That's it!!!
Layer between pieces of waxed paper or paper towels; keep warm.

Total Pageviews

Follow Me on Twitter!