I'm not Irish. At All. I'm Puerto Rican. But I wanted to join in on the St. Patty's Day fun, so I baked a cake. This cake has to be a semi flop. I will admit that I was impatient and that my husband was rushing me to eat this cake, so I kinda didn't let it cool all the way, and because of that, it was kinda a nightmare to decorate. So I didn't do much to make it all pretty, but it tasted really really good!! I'm going to have to make it again and make it right next time!
This recipe was featured!

Borrowed this recipe from
Recipe Girl
This is basically everything you need for this recipe.
What you need for the Cheesecake:
Two 8-ounce packages cream cheese, at room temperature
2/3 cup granulated white sugar
1/3 cup sour cream or plain yogurt
1/3 cup heavy whipping cream
1 teaspoon vanilla extract ( I ran out of vanilla extract, so I used some vanilla beans!)
a few drops of green food coloring, if desired
What you will need to do for the Cheesecake:
1. Preheat the oven to 325.
Place a large roasting pan on the lower third rack of the oven. Place a pot of water on the stove to boil.
Spray a 9-inch springform pan with nonstick spray and line the bottom. Wrap a double layer of heavy duty foil around the bottom and up the sides of the pan (you want to seal it so the water from the water bath doesn’t seep into the pan).
In a large bowl, use an electric mixer to blend the cream
cheese until it is smooth and creamy, 1 to 2 minutes.
Mix in the sugar and salt
and blend for 2 minutes, scraping down the sides of the bowl to make sure all
is mixed in. Add the eggs, one at a time, blending after each addition.
Finally, mix in the sour cream, whipping cream and vanilla (and food color, if
using). Mix until smooth.
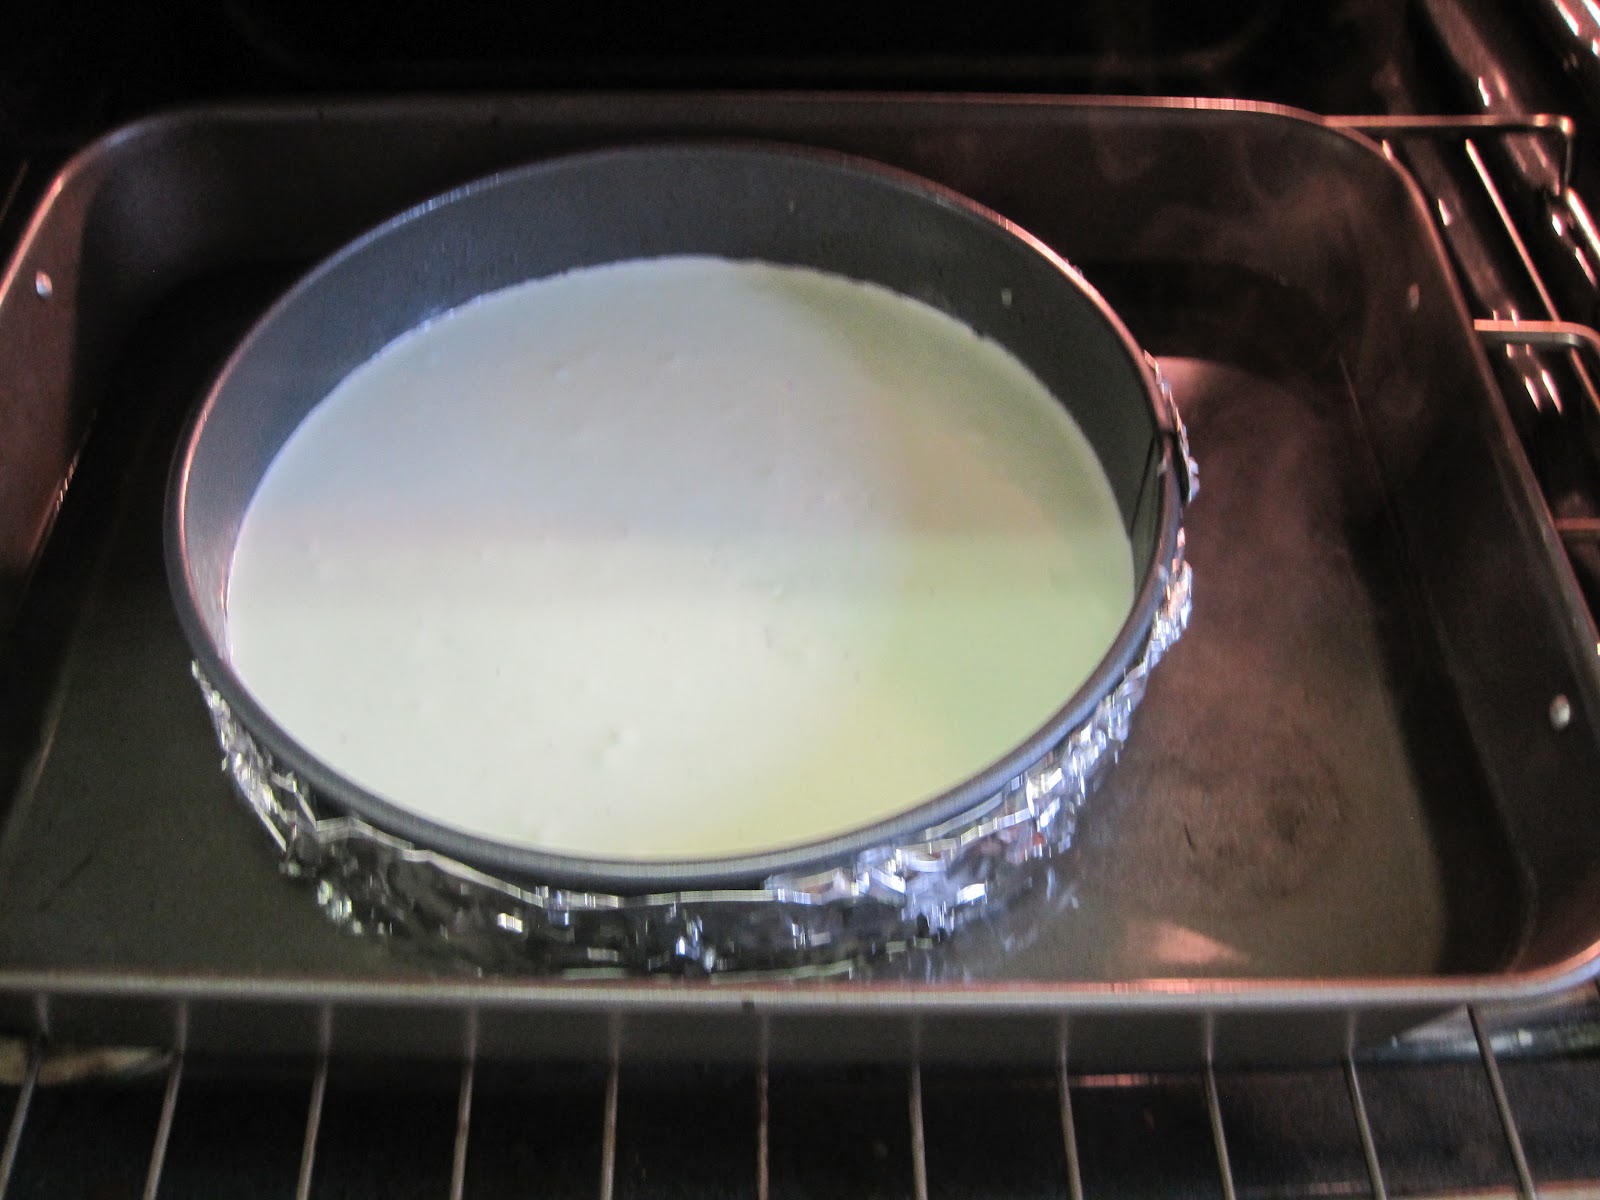
Pour the batter into the prepared pan. Set the pan
into the roasting pan in the pre-heated oven. Carefully pour the hot water from
your kettle into the roasting pan.
Pour enough water so that there is about an
inch of water coming up the foil along the sides of the cheesecake pan.
(Mine has black spots because I put in vanilla beans and they didn't all mash out correctly, so my cheesecake was more a vanilla bean cheesecake, it was delish and I recommend adding vanilla beans)
Bake the cheesecake for 45 minutes. It should be set to the
touch and not jiggly. Remove the cheesecake from the roasting pan and let it
cool on a wire rack for at least an hour. When it has cooled, place the pan
into the freezer and let the cheesecake freeze completely (4 to 5 hours or
overnight).
What you need for the Green Velvet Cake:
2 1/2 cups all-purpose flour
2 tablespoons cocoa powder
1/2 teaspoon salt
1 1/2 cups canola or vegetable oil
1 1/2 cups granulated white sugar
2 large eggs
1 teaspoon vanilla extract
1 teaspoon white vinegar
1 teaspoon baking soda
1 cup buttermilk
2 tablespoons (1-ounce bottle) green food coloring
What you need to do for the Green Velvet Cake:
Preheat the oven to 350.
Spray two 9-inch round pans with nonstick spray and line each pan with a round
of parchment paper. In a medium bowl, sift together the flour,
cocoa powder and salt. In a large bowl, combine the oil and sugar together and
beat with an electric mixer for 2 minutes. Add the eggs, one at a time, and the
vanilla, and beat for an additional 2 minutes.
In a small bowl, combine the vinegar and baking soda and
stir to dissolve. Add the vinegar to the bowl, along with the buttermilk and
food coloring. Beat on medium-low speed for 1 minute, until blended. Add the
dry ingredients and increase speed to medium-high, scraping down the sides of
the bowl while mixing, for 2 additional minutes.
(Or do what I did: Mix dry wet ingredients first then mix in dry ingredients with my mixer.)
Divide the batter evenly
between the prepared pans.
Bake 30 to 35 minutes, or until a toothpick inserted
into the center comes out with a few moist crumbs attached.
Let the cakes cool
for 20 minutes.
Run a knife along the edge of the pans, then invert the cakes
onto a rack to cool completely.
What you need for the Frosting:
Two 8-ounce packages cream cheese, at room temperature
1/2 cup unsalted butter, at room temperature
One 7-ounce jar marshmallow creme
1 cup powdered sugar
a few drops of green food coloring, if desired
In a large bowl, using an electric
mixer on medium-high speed, combine the cream cheese and butter and beat until
creamy and smooth. Add the marshmallow creme and mix until smooth. Add in the
powdered sugar (and food color, if using) and continue to beat, scraping down
the sides of the bowl, until all of the ingredients are mixed in and the
frosting is smooth and spreadable. Keep frosting in fridge until you are ready to use it.
Assembling the cake:
Place one cake layer into the center
of a cake plate or platter. Remove the cheesecake from the freezer, take off
the sides of the pan, and slide a knife under the parchment to remove the
cheesecake from the pan. Peel off the parchment.
I added a little bit of frosting between the bottom layer of cake and the cheesecake just so there was no sliding.
Trim the cheesecake, as needed
to match the size of your cake layers.
Place the cheesecake layer
on top of the first cake layer. Add more frosting on top of cheesecake. Place the second cake layer on top of the
cheesecake.
If you would like to know how to spread your frosting, refer to
HERE. Decorate, as desired.
Keep it stored in the refrigerator.
It also freezes perfectly. Freeze it as is, then wrap it in plastic wrap and
store it in the freezer until it is needed. Leftover slices may also be wrapped
and frozen.
This recipe is linked to
THESE awesome blog hops!