RSS
Showing posts with label Featured. Show all posts

Green Velvet Cheesecake Cake

I'm not Irish. At All. I'm Puerto Rican. But I wanted to join in on the St. Patty's Day fun, so I baked a cake. This cake has to be a semi flop. I will admit that I was impatient and that my husband was rushing me to eat this cake, so I kinda didn't let it cool all the way, and because of that, it was kinda a nightmare to decorate. So I didn't do much to make it all pretty, but it tasted really really good!! I'm going to have to make it again and make it right next time! 
This recipe was featured!


Borrowed this recipe from Recipe Girl
This is basically everything you need for this recipe.

What you need for the Cheesecake:
Two 8-ounce packages cream cheese, at room temperature
2/3 cup granulated white sugar
pinch of salt
2 large eggs
1/3 cup sour cream or plain yogurt
1/3 cup heavy whipping cream
1 teaspoon vanilla extract ( I ran out of vanilla extract, so I used some vanilla beans!)
a few drops of green food coloring, if desired


What you will need to do for the Cheesecake:
1. Preheat the oven to 325. Place a large roasting pan on the lower third rack of the oven. Place a pot of water on the stove to boil. 
Spray a 9-inch springform pan with nonstick spray and line the bottom. Wrap a double layer of heavy duty foil around the bottom and up the sides of the pan (you want to seal it so the water from the water bath doesn’t seep into the pan).

In a large bowl, use an electric mixer to blend the cream cheese until it is smooth and creamy, 1 to 2 minutes.

 Mix in the sugar and salt and blend for 2 minutes, scraping down the sides of the bowl to make sure all is mixed in. Add the eggs, one at a time, blending after each addition. Finally, mix in the sour cream, whipping cream and vanilla (and food color, if using). Mix until smooth.

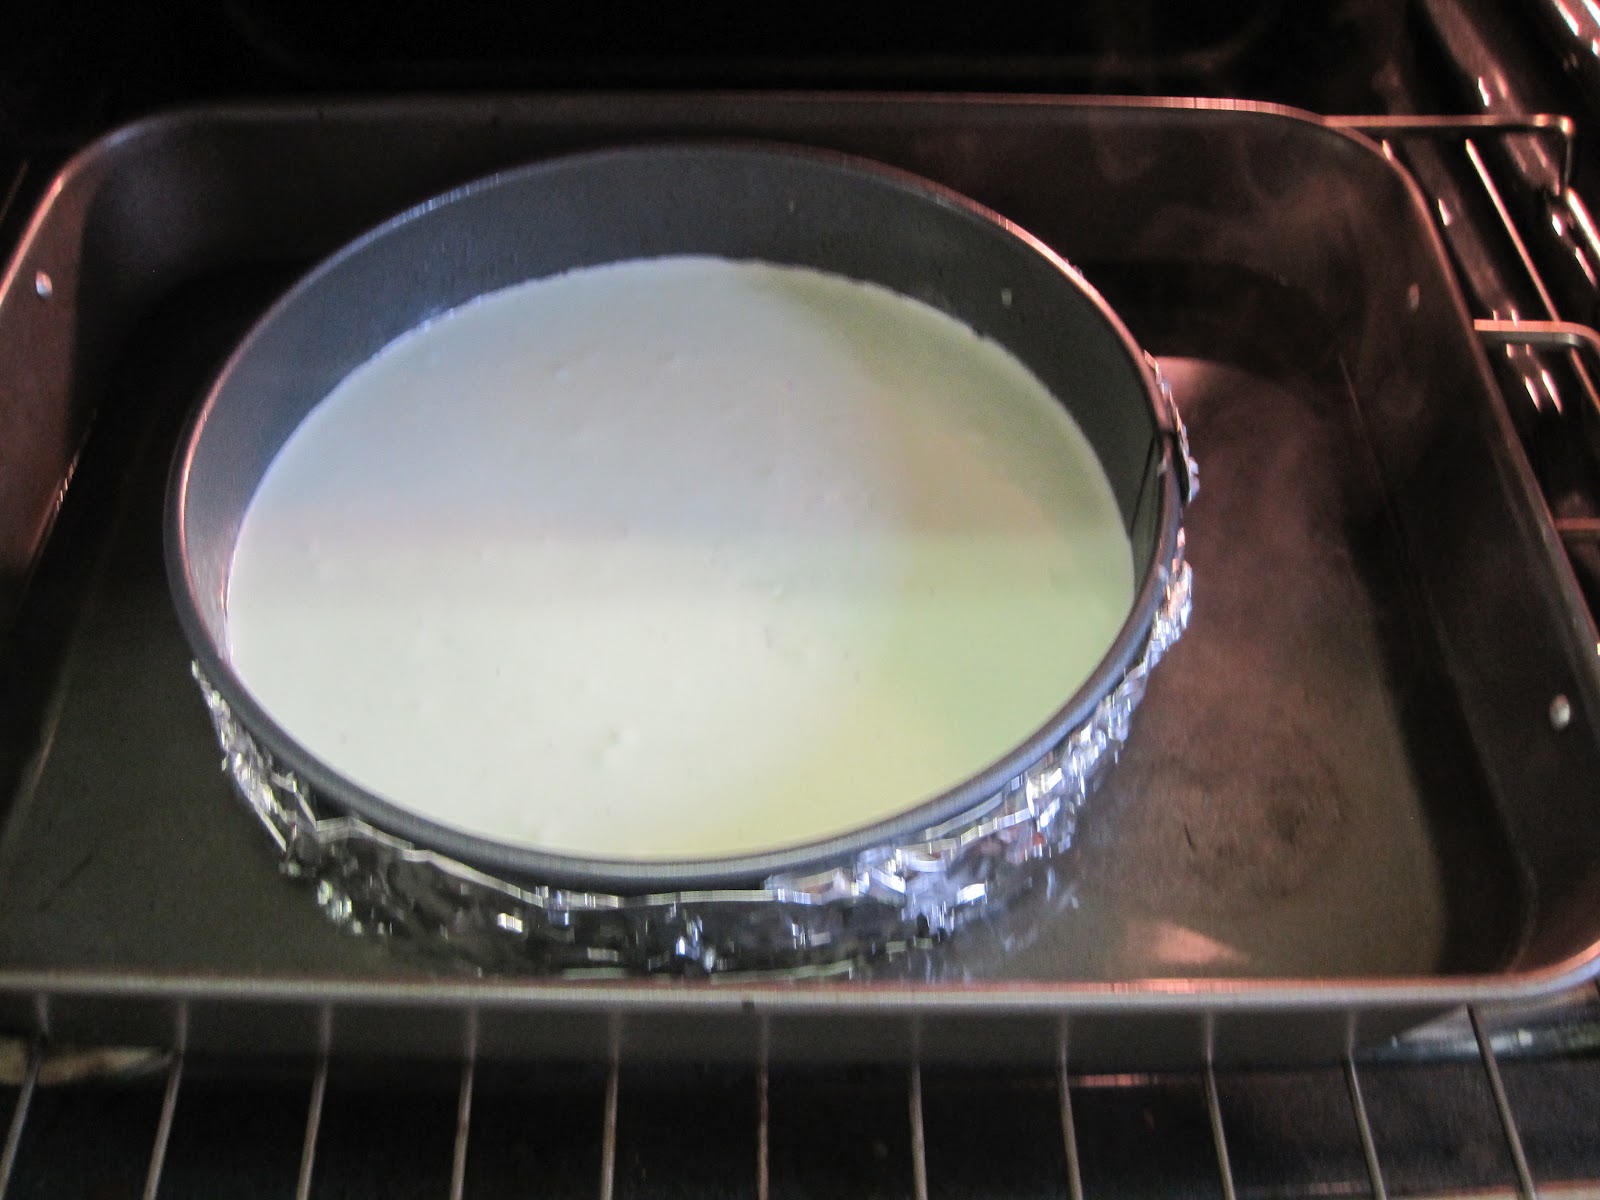
Pour the batter into the prepared pan. Set the pan into the roasting pan in the pre-heated oven. Carefully pour the hot water from your kettle into the roasting pan.

Pour enough water so that there is about an inch of water coming up the foil along the sides of the cheesecake pan.
(Mine has black spots because I put in vanilla beans and they didn't all mash out correctly, so my cheesecake was more a vanilla bean cheesecake, it was delish and I recommend adding vanilla beans)
Bake the cheesecake for 45 minutes. It should be set to the touch and not jiggly. Remove the cheesecake from the roasting pan and let it cool on a wire rack for at least an hour. When it has cooled, place the pan into the freezer and let the cheesecake freeze completely (4 to 5 hours or overnight).


What you need for the Green Velvet Cake:
2 1/2 cups all-purpose flour
2 tablespoons cocoa powder
1/2 teaspoon salt
1 1/2 cups canola or vegetable oil
1 1/2 cups granulated white sugar
2 large eggs
1 teaspoon vanilla extract
1 teaspoon white vinegar
1 teaspoon baking soda
1 cup buttermilk
2 tablespoons (1-ounce bottle) green food coloring

What you need to do for the Green Velvet Cake:
Preheat the oven to 350. Spray two 9-inch round pans with nonstick spray and line each pan with a round of parchment paper. In a medium bowl, sift together the flour, cocoa powder and salt. In a large bowl, combine the oil and sugar together and beat with an electric mixer for 2 minutes. Add the eggs, one at a time, and the vanilla, and beat for an additional 2 minutes.
In a small bowl, combine the vinegar and baking soda and stir to dissolve. Add the vinegar to the bowl, along with the buttermilk and food coloring. Beat on medium-low speed for 1 minute, until blended. Add the dry ingredients and increase speed to medium-high, scraping down the sides of the bowl while mixing, for 2 additional minutes.
(Or do what I did: Mix dry wet ingredients first then mix in dry ingredients with my mixer.)

Divide the batter evenly between the prepared pans.

Bake 30 to 35 minutes, or until a toothpick inserted into the center comes out with a few moist crumbs attached.
Let the cakes cool for 20 minutes.

Run a knife along the edge of the pans, then invert the cakes onto a rack to cool completely.


What you need for the Frosting:
Two 8-ounce packages cream cheese, at room temperature
1/2 cup unsalted butter, at room temperature
One 7-ounce jar marshmallow creme
1 cup powdered sugar
a few drops of green food coloring, if desired

In a large bowl, using an electric mixer on medium-high speed, combine the cream cheese and butter and beat until creamy and smooth. Add the marshmallow creme and mix until smooth. Add in the powdered sugar (and food color, if using) and continue to beat, scraping down the sides of the bowl, until all of the ingredients are mixed in and the frosting is smooth and spreadable. Keep frosting in fridge until you are ready to use it.

Assembling the cake:
 Place one cake layer into the center of a cake plate or platter. Remove the cheesecake from the freezer, take off the sides of the pan, and slide a knife under the parchment to remove the cheesecake from the pan. Peel off the parchment.
I added a little bit of frosting between the bottom layer of cake and the cheesecake just so there was no sliding.
Trim the cheesecake, as needed to match the size of your cake layers.
Place the cheesecake layer on top of the first cake layer. Add more frosting on top of cheesecake. Place the second cake layer on top of the cheesecake.

If you would like to know how to spread your frosting, refer to HERE.   Decorate, as desired.


Keep it stored in the refrigerator. It also freezes perfectly. Freeze it as is, then wrap it in plastic wrap and store it in the freezer until it is needed. Leftover slices may also be wrapped and frozen.

This recipe is linked to THESE awesome blog hops!

Blue Velvet Cake with Cream Cheese Frosting and Blueberries

Well, here it is! The BLUE VELVET CAKE for Joe's Birthday!
This recipe was featured on 


I'm not a huge cake maker, but I love to decorate. I don't know why I get cupcakes so much but I can't get cakes. I got this recipe from Adventures in Cooking and if I have not told you before, I am HORRIBLE at following directions. HORRIBLE, I say! I feel like the instructions to this cake were crazy, first off, not in order and just all out confusing. But that could just be me; like I said, I'm horrible at following directions. I never have butter or eggs at room temp, because I don't plan me baking, it just happens! I don't do all this mixing the dry ingredients and wet separately (unless I'm hand mixing) because I have an amazing mixer which mixes everything rather exceptionally! Anyways, moral of the story... horrible at reading instructions. 


Review of the cake: It came out REALLLLLLLY spongy, it needed a lot more cocoa powder, after velvet cake is basically a chocolate-y cake with tons of dye and needs to be smooth! It's called a VELVET cake not sponge cake! Other than that, it came out really good! Especially the frosting and blueberry syrup! SO I have made some corrections to the ingredients. If you have anymore suggestions or corrections, I'd love to hear them!

Ok onto the cake!

What you'll need for Blue Vevlet Cake:

1 1/4 Cups Cake Flour, sifted
1/2 Cup and 3/4 Cups Granulated Sugar
1/3 cup Cocoa Powder (This is my addition, regular says 1Tbsp)
11 Egg Whites, room temperature (NOTE: this equals roughly 6 eggs, with yolk. ***If you only do egg whites, add in vegetable oil to make it more tender and moist, not tough and spongy***)
3 Teaspoons Vanilla Extract
1 1/2 Teaspoons Cream of Tartar
2 oz. Blue Food Coloring
1/4 Teaspoon Salt
Fresh Blueberries

What you need to do for Blue Velvet Cake:
-Preheat the oven to 375 degrees 
-In a medium-sized bowl, or your mixer, sift together the flour, 1/2 cup of the sugar, and the cocoa powder. 
-In a large bowl, beat together the egg whites, vanilla extract, cream of tartar and salt until they begin to hold soft peaks. 
-Beat in the remaining 3/4 cups sugar and the blue food coloring until the mixture begins to hold stiff peaks, about 4 minutes or so.

-Slowly fold in 1/4 cup of the flour mixture at a time. Make sure to fold, not to stir. 
-Grease very well two 9 inch Spring Form cake pans. Pour batter into pans.
-Bake in the oven for about 30 minutes or until a toothpick comes out of the middle clean

Meanwhile, make the Cream Cheese Frosting that I love oh so much and the blueberry syrup.

Cream Cheese Frosting is HERE

What you need for the Blueberry Syrup:
1 Cup Blueberries, fresh or frozen (but not frost bitten), pureed
1/2 Cup Granulated Sugar
1/4 Cup Water
1 Cup Blueberry Jam, good quality

1 tbsp cornstarch
3-4 tbsp blueberry syrup, cooled

What you need to do for the Blueberry Syrup:

-In a small saucepan, cook the blueberries, sugar and water over low heat for about 8 minutes, or until the sugar has completely dissolved. (I boiled my blueberries since they were frozen, then pureed them)
-Add in jam, make sure to thoroughly mix in. From here, make it to your taste, add  in more sugar or maybe more water. Up to you! 
-Cool your blueberry syrup (I added ice cubes in it)
-Get your cornstarch and mix in with the cooled blueberry syrup (image below)
-Stir in with the rest of the blueberry syrup to help thicken.
-Pour into a serving bowl and place in the refrigerator to chill until serving time.


Cake, Continued...
-Once the cake is done, remove it from the oven and allow to cool for about 15 minutes. 
-Unclasp the hook on the spring form pan, let cool completely.

- Did your cake come out with an ugly 'hill' on top? Carefully and evenly slice it off! If it's not that even, its ok! Use it as your bottom instead! 

-Get the Cake Stand, or if you don't have one, use a flat plate, wide enough to hold the cake plus frosting on the sides, that you can serve it off of.
- Place one cake evenly in the middle of cake stand. 
-FROSTING TIME! YAY!
- Place a HEAPING scoop on top of cake. Spread evenly on top of the cake, not on the sides yet. 

Here is how to spread frosting, just FYI:
 Start with a heaping scoop

Spread to one side, in a slow, smooth motion.

Without stopping, spread in the opposite direction in the same slow, smooth motion.

Keep going back and forth, slowly, smoothly, whilst moving your motions north or south, side to side.

This is how it should start looking.
Smoothed out dip in the middle, swaying side to side.

Once you get the middle evenly spread, spread out the edges. 
Here you can omit extra frosting if this is the middle layer.

Place evenly, so that they're are aligned perfectly the other cake on top of the frosting.
Place other heaping scoopful on top of the cake and spread evenly, the same way I showed you earlier.

On the top layer, spread it out to the edges. keep your hand still as you move your cake stand in a spinning motion. Spread it all out evenly. Don't worry about the edges of the cake, because we're going to have more frosting put on it to hide it!  

Here's a helpful tip for smoothness:
Dip your spatula into hot water, whip off excess water, then spread out the frosting thinly, one more time. This will give it a smoother look!

I don't know if you can see it well, but the middle 'swipe' is from the hot spatula; you can compare and contrast the difference. 

Frosting gun time!
Here's a tip to help keep the frosting in the baggy, if you use them.
A lot of people, including me for the longest time, don't know that you can twist the top and it won't squeeze out! Very effective! 

Remember:
Wipe off the extra frosting smudges on the side!

Make decor however you'd like.
I chose to make a cute and simple beaded outlining.

So, once you have outlined it (Make sure for the top/cake edge don't make the outlining somewhat diagonal, but flat on the surface but on the edge, if that make sense.)
Spread your syrup on the surface with a spoon. It's ok if the syrup falls to the edge, unless you don't want it to, but I did :)

Then add blueberries! You can spread them, but I had to leave room for 26 candles!
 Serve at room temperature with a drizzle of blueberry syrup over each individual cake slice, if you'd like!
Enjoy!

This recipe is linked up to THESE awesome blog hops!


Homemade Conversation Hearts!

I wanted be clever this year and make conversation heart cookies, but I saw them everywhere! So I found a recipe to make your own conversation heart candy! These aren't difficult but a bit messy. I would recommend this if you have kids, something easy and fun so they can join you!
Got this recipe from HERE

This recipe was featured on Miz Helen's Country Cottage!
Miz Helen’s Country Cottage
What you need:
1 packet (1/4 oz, or 2 tsp) unflavored gelatin
1/2 cup water
2 tsp light corn syrup
2 lbs powdered sugar, plus additional for dusting
Assorted flavoring extracts of your choice
Assorted food colors of your choice
Heart-shaped cutters
Food coloring markers

What you need to do:
1. Place the corn syrup, gelatin, and water in a small microwave-safe bowl. Stir until the gelatin is well-distributed. Microwave the mixture for 30 seconds, so the gelatin dissolves, and stir well.


Pour the gelatin mixture into the bowl of a large stand mixer fitted with a paddle attachment. Alternately, if you are using a hand mixer, pour the gelatin mixture into a large bowl. Slowly add one cup at a time until it's all mixed in.
 At first it'll look like Elmer's Glue 

 Once mixed it should look something like this! (This is a forth of it)
Cut it into quarters.

 Dye each quarter their own color.

 Fold in, Fold in, Fold in.

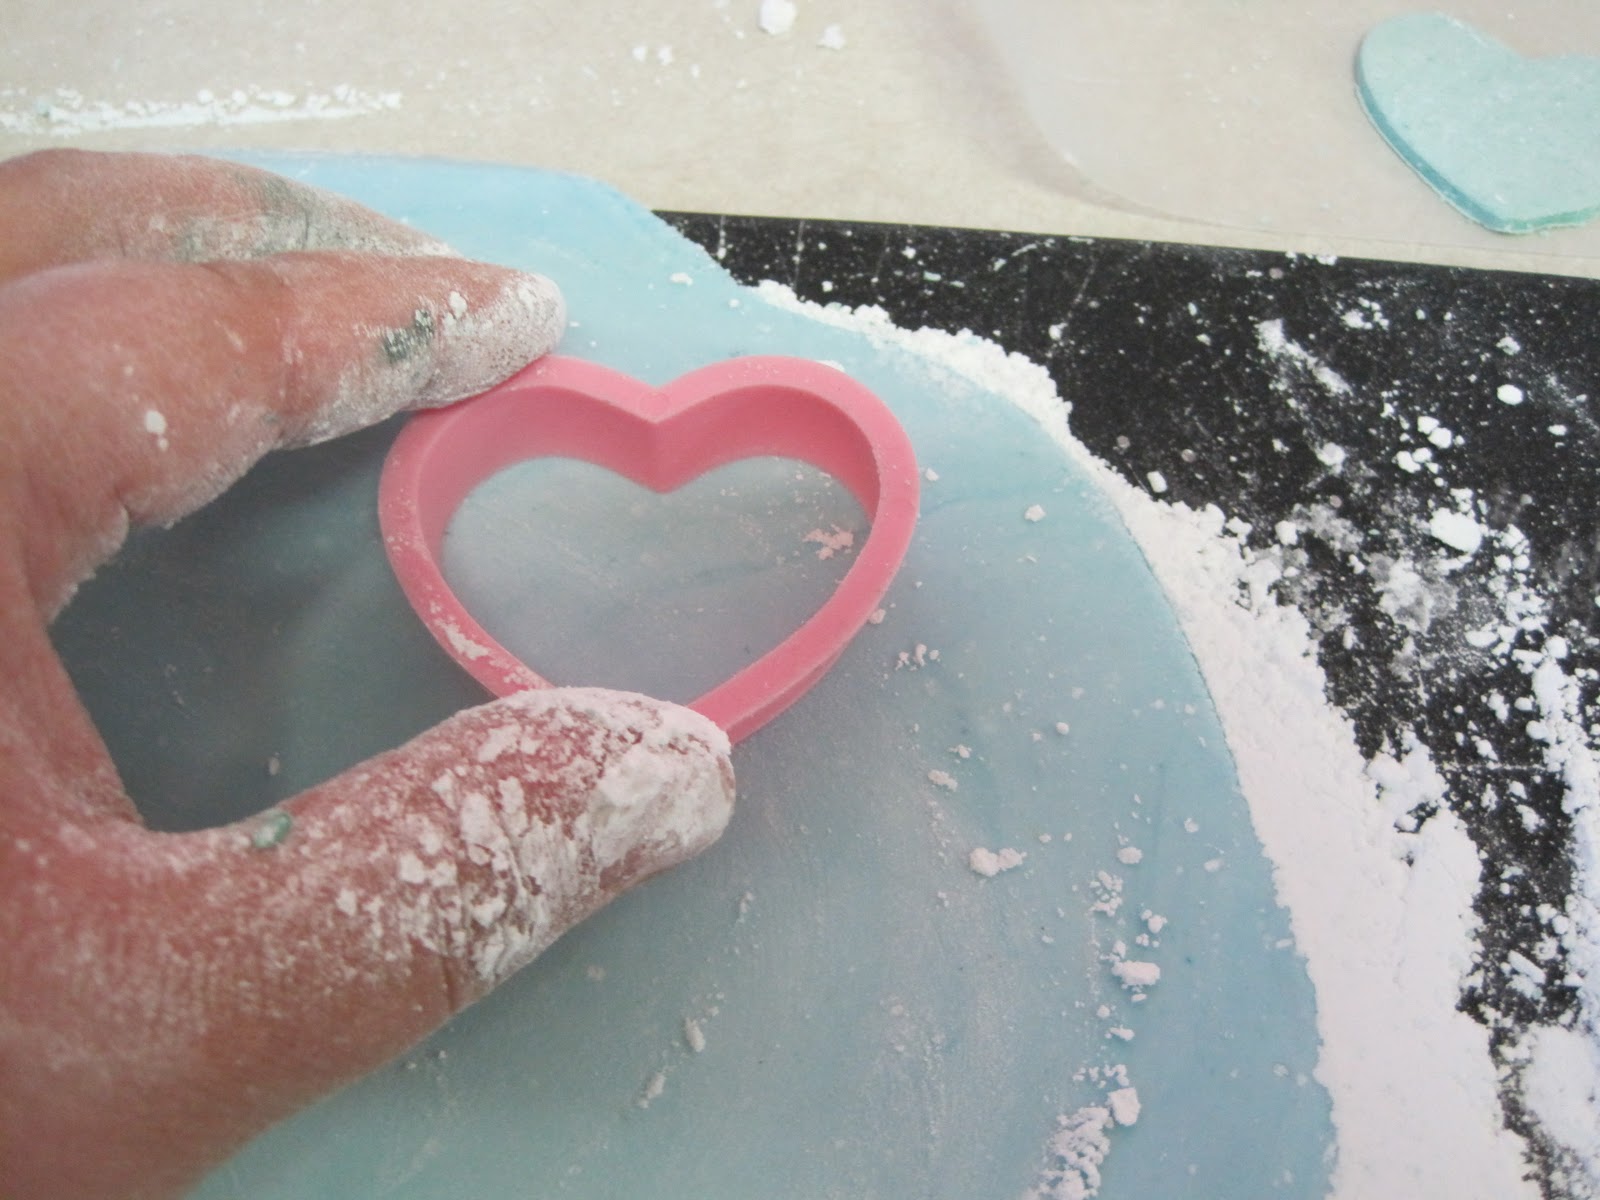
Flatten out and cut with a cookie cutter.


Scoop up and place on wax paper.


Allow your hearts to air-dry for at least 24 hours before you write on them. 
This step is VERY important, because the extra moisture in the hearts will cause the ink to run if you do not let them dry properly.
Write with either a marker or a toothpick.

Store your conversation hearts in an airtight container at room temperature.
Linked to THESE awesome blog hops!

Total Pageviews

Follow Me on Twitter!